


 2019-11-06
in
2019-11-06
in

 7 min read
I’m working on prototyping some new desktop and mobile applications. One of the things I want them to be able to do is the “infinite scroll” workflow that you see in social media timelines like on Twitter, Diaspora, and etc. It’s essentially when you almost get to the bottom of your timeline it automatically loads it with more informaiton. As usual my go-to framework for doing the desktop is Avalonia
. I’m using a basic ListBox
so my first thought was to simply look for scroll events and scroll percentages (or some metric like that). It turns out that’s not directly and easily exposed. The solution was to manually wire up similar event handlers using similar properties that are exposed in more raw terms. Below is a break down on how I did it. You can find the solution to this in this Gitlab Repository
.
(I want to thank the Egram for writing their Avalonia-based Telegram client with an open source license and publishing it here . The way they handled more complex scrolling behavior interception led me to this solution). Thanks to MakcStudio for cluing me into the existence of this project and their source code.
** Note this is a second version with a cleaner implementation of capturing the events using GetObservable. **
NOTE: This article is from 2019 and Avalonia has been under active development and improvement since that time. Please consult newer tutorials and documentation for how to use this against current releases of Avalonia.
Because this is a more advanced tutorial I’m going to skip with the “starting from scratch” and jump right to the core part. You can look at the Avalonia Getting Started Tutorial or my own hello world example to help jumpstart. The core of how this works is that we need to track the ListBox’s scroll position information and compare it to its maximum scroll position. Whenever we detect that we are at the bottom of the ListBox we want to add more items.
Our MainWindow.xaml will define the ListBox and a button to manually add items:
<Window xmlns="https://github.com/avaloniaui"
        xmlns:x="http://schemas.microsoft.com/winfx/2006/xaml"
        xmlns:vm="clr-namespace:InfiniteScrollDemo.ViewModels;assembly=InfiniteScrollDemo"
        xmlns:d="http://schemas.microsoft.com/expression/blend/2008"
        xmlns:mc="http://schemas.openxmlformats.org/markup-compatibility/2006"
        mc:Ignorable="d" d:DesignWidth="450" d:DesignHeight="450"
        Width="450" Height="450"
        x:Class="InfiniteScrollDemo.Views.MainWindow"
        Icon="/Assets/avalonia-logo.ico"
        Title="InfiniteScrollDemo">

    <Design.DataContext>
        <vm:MainWindowViewModel />
    </Design.DataContext>

    <Grid RowDefinitions="*, Auto" ColumnDefinitions="*">
        <ListBox Grid.Row="0" Grid.Column="0" Name="ListOfItems" Items="{Binding Items}" />
        <Button Grid.Row="1" Grid.Column="0" Content="Add Items" Command="{Binding AddItemsCmd}"/>
    </Grid>

</Window>
Looknig at the Items field you can see we bound it to a similarly named Items field in the MainWindowViewModel. The button has an event bound to a ReactiveCommand on the view model called AddItemsCmd. Let’s take a look at our view model:
public class MainWindowViewModel : ViewModelBase
{
    public ObservableCollection<string> Items { get; }

    public ReactiveCommand<Unit, Unit> AddItemsCmd { get; }

    public MainWindowViewModel()
    {
        Items = new ObservableCollection<string>(GenerateItems(1));
        AddItemsCmd = ReactiveCommand.Create(() => AddItems());
    }

    public void AddItems(int count = 10)
    {
        GenerateItems(count).ForEach(item => Items.Add(item));
        Items.Add("Last Item from this Addition");
    }

    private List<string> GenerateItems(int count)
    {
        var list = new List<string>(count);
        for (int i = 0; i < count; i++)
        {
            list.Add($"New String @{++Counter}");
        }

        return list;
    }

    private int Counter { get; set; }
}
At the top you see the two fields we bound our view to. In the constructor you see us filling it with a default set of items and building a ReactiveCommand that calls the AddItems method whenever it is invoked. We are going to use the exact same AddItems call into the view model to auto-populate additional items when we scroll to the bottom. The items added are simple strings that keep increasing in count but with a “last item” ending string so we can see where the items are being added or not. This part was all very straight forward let’s now look at the more complicated part: calculating the scroll position and figuring out if we are at the bottom (or top) of the scroll view. For this demo we are going to do all of that heavy work in the MainWindow.xaml.cs file:
Let’s break down what’s happening in the code. First thing we need to do is get a reference to our listbox:
var listBox = this.FindControl<ListBox>("ListOfItems");
With this reference we can now start capturing events, property changes etc. We are going to want to track whenever the scroll position changes on our ListBox control, and when it does we want to do something asynchronously (because we don’t want our UI to be locked while this is going on):
With this handle we now want to start subscribing when the ScrollViewer is added to our ListBox (which should only happen once per control). We will then subscribe to whenever the ScrollProperty changes (again just created the one time):
listBox.GetObservable(ListBox.ScrollProperty)
    .OfType<ScrollViewer>()
    .Take(1)
    .Subscribe(sv => {...});
The core logic is going to go where the ellipses are. In this logic we are going to be doing. The big thing we will be doing of course is actually adding more items when we get to the bottom of the vertical scroll bar. So to do that we will be constantly getting updates to the scroll bar position, calculating whether we are at the bottom, and if we are then trigger an event. The second thing we need to do is to update the total size of the scroll bar whenever it changes due to a window resize or something like that. We will be using the same GetObservable/Subscribe methodology we used to get our ScrollView but we will be doing it for two ScrollView properties: VerticalScrollBarMaximumProperty and OffsetProperty. Subscribing to the size update is very straight forward:
sv.GetObservable(ScrollViewer.VerticalScrollBarMaximumProperty)
    .Subscribe(newMax => _verticalHeightMax = newMax)
    .DisposeWith(_scrollViewerDisposables);
Everytime the property changes it’ll have a new max height value and we set the field we are using to that new value. With any of these sorts of subscriptions you will want to capture disposing of these so they don’t leak. As you’ll see in the full listing the CompositeDisposable class is useful for this. You’ll just put a Dispose in your class’s cleanup methods and you’ll be good to go. The handler code for the calculation of hitting the bottom and adding more data looks like:
sv.GetObservable(ScrollViewer.OffsetProperty)
    .Subscribe(offset =>
    {
        if (offset.Y <= Double.Epsilon)
        {
            Console.WriteLine("At Top");
        }

        var delta = Math.Abs(_verticalHeightMax - offset.Y);
        if (delta <= Double.Epsilon)
        {
            Console.WriteLine("At Bottom");
            var vm = DataContext as MainWindowViewModel;
            vm?.AddItems();
        }
    }).DisposeWith(_disposables);
Once again we are subcribing to the property and getting the latest value. We are calculating our position relative to the highest position of the scroll bar that we are always tracking with the other handler. If we are at the top (it’s zero) then we print out “At Top”. If we are at the bottom (the difference between max height and our offset is zero) then we print out “At Bottom” and call the same AddItems method as we did with the button. Because positions are doubles not integers it’s best not to use an exact equality check to zero since it is possible to have machine epsilon level offsets. The comparisons here reflect that. When you put it all together with the rest of the code around it you get:
public class MainWindow : Window
{
    private CompositeDisposable _disposables = new CompositeDisposable();

    private CompositeDisposable _scrollViewerDisposables;

    private double _verticalHeightMax = 0.0;

    public MainWindow()
    {
        InitializeComponent();

        var listBox = this.FindControl<ListBox>("ListOfItems");
        listBox.GetObservable(ListBox.ScrollProperty)
            .OfType<ScrollViewer>()
            .Take(1)
            .Subscribe(sv =>
            {
                _scrollViewerDisposables?.Dispose();
                _scrollViewerDisposables = new CompositeDisposable();

                sv.GetObservable(ScrollViewer.VerticalScrollBarMaximumProperty)
                    .Subscribe(newMax => _verticalHeightMax = newMax)
                    .DisposeWith(_scrollViewerDisposables);


                sv.GetObservable(ScrollViewer.OffsetProperty)
                    .Subscribe(offset =>
                    {
                        if (offset.Y <= Double.Epsilon)
                        {
                            Console.WriteLine("At Top");
                        }

                        var delta = Math.Abs(_verticalHeightMax - offset.Y);
                        if (delta <= Double.Epsilon)
                        {
                            Console.WriteLine("At Bottom");
                            var vm = DataContext as MainWindowViewModel;
                            vm?.AddItems();
                        }
                    }).DisposeWith(_disposables);
            }).DisposeWith(_disposables);
    }

    private void InitializeComponent()
    {
        AvaloniaXamlLoader.Load(this);
    }

    protected override void OnClosed(EventArgs e)
    {
        base.OnClosed(e);
        _scrollViewerDisposables.Dispose();
        _disposables.Dispose();
    }
}
…and the application when it runs looks like below.
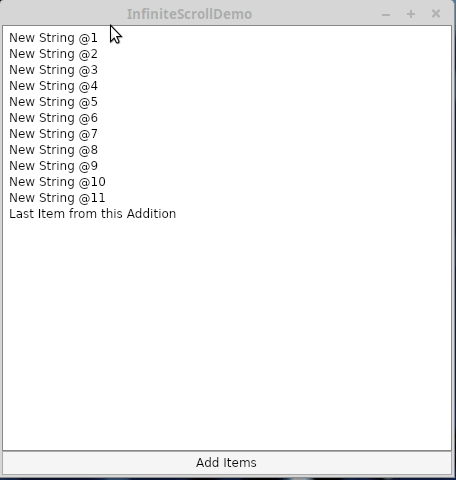
Infinite Scroll Demo in Action
Since this is useful in multiple places it’s actually been pointed out that it’d be ideal to make this a Behavior in a library that can be reused. Dan Walmsley has provided a lot of guidance that made my working but not as good code much better and has provided a PR that shows how to turn this into an Avalonia Behavior . I look forward to doing that and making a post about how one goes about that as well.