


 2021-11-17
in
2021-11-17
in

 6 min read
Facebook actually has a mechanism for users to download their entire history from their site. It’s not exactly on the front page but not entirely hidden. If you don’t download it correctly it’s hopelessly difficult to make it useful. When you do do it correctly it is still difficult to use but with a tool like my Kyanite archive viewer it is possible to finally get access to your Facebook data in a meaningful way. This post is about how one can properly generate this archive within Facebook to use with this tool.
What follows is the step by step process process for requesting your archive through the browser and then downloading it and preparing it for use in Kyanite.
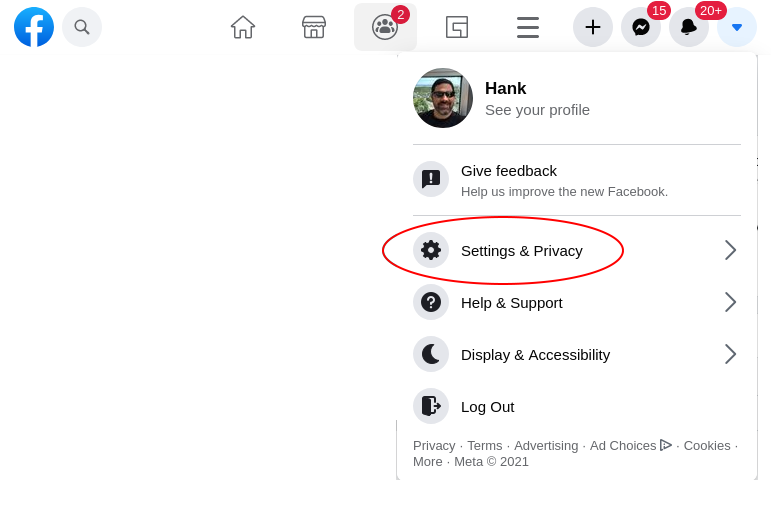
On the main Facebook screen there is a menu bar up top. To the far right is a circular button with a down triangle which calls up the “Account” menu. Click on that to drop it down. In there you will want to select the “Settings & Privacy” menu option. That brings up the “Settings & Privacy” sub-menu over top of it, shown below.
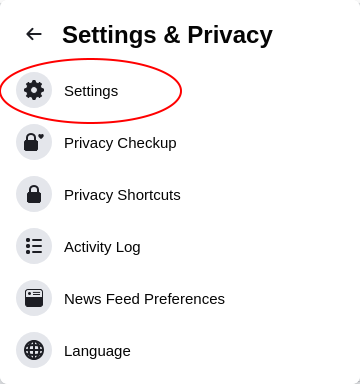
Click on the “Settings” option which brings us to the setting screen. This screen is where all of your account settings are configured. We want to click the “Your Facebook Information” button near the top left of the Settings menu options which brings up that screen. A screenshot of the “Your Facebook Information” settings is shown below.
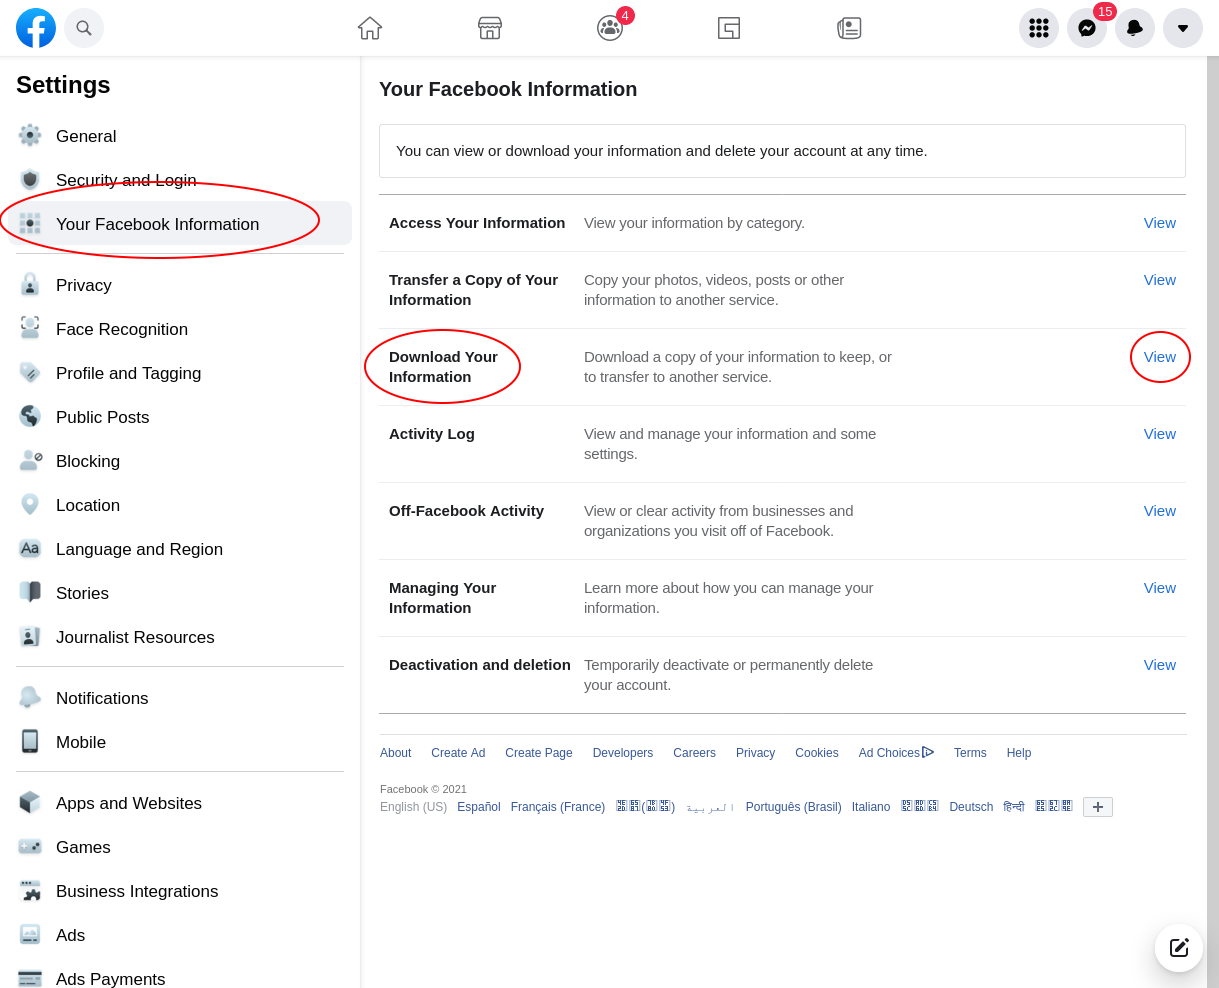
Near the middle is the “Download Your Information” option. To get to it click the “View” hyperlink at the far right of that row. This brings up the Downloads Screen, as shown:
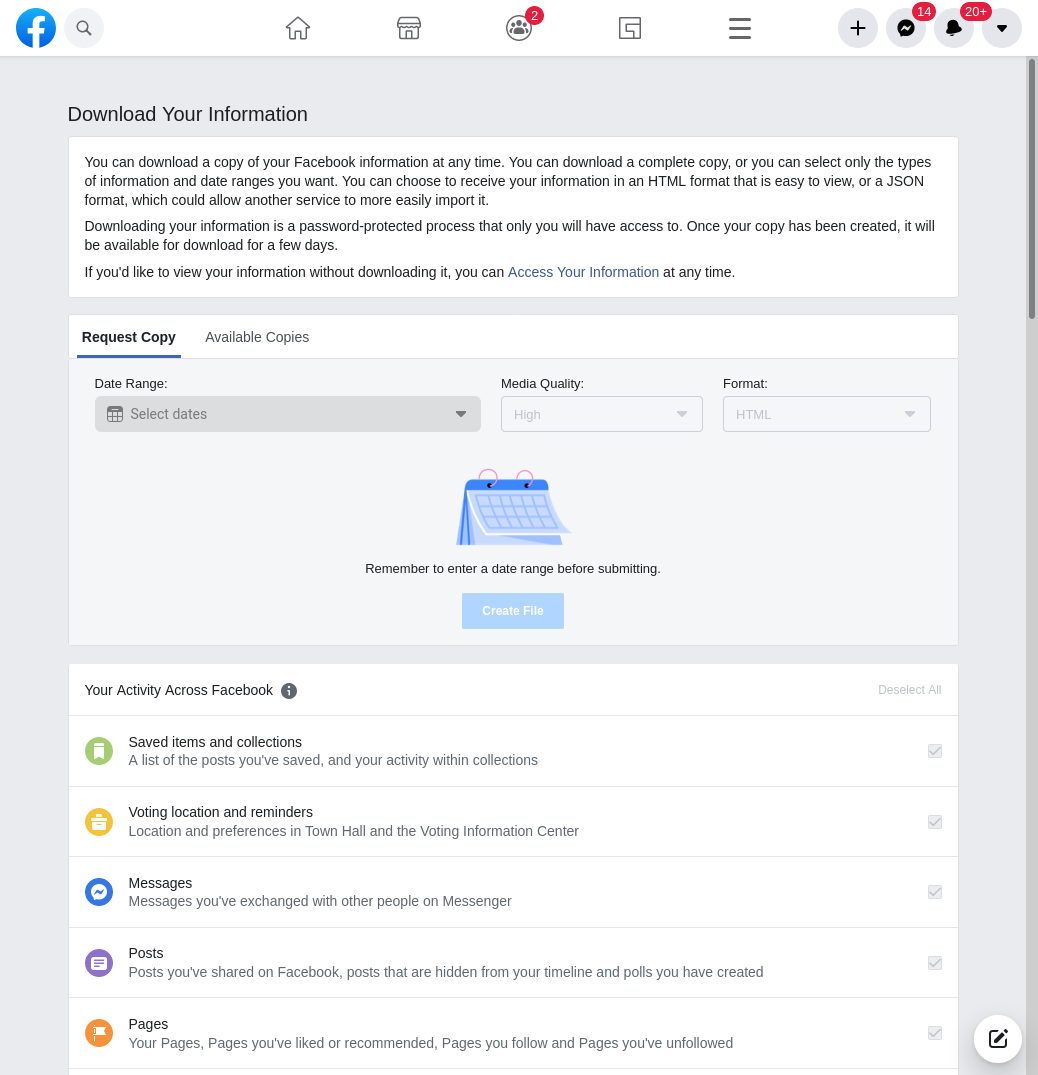
By default all of “Your Activity Across Facebook” will be downloaded. Unless you are really sure you don’t want parts of that being exported you should leave these defaults. The settings at the top however we are going to want to configure. For the “Format” field we will want to toggle it to JSON. The JSON format is the one that Kyanite uses. For the “Media Quality” field you probably want this to be high as well. This will ensure you get the highest quality versions of the images and videos that you’ve uploaded to Facebook over the years. Lastly we look at the date selection. A screenshot of the date selector expanded, with the quality and format already configured, is below:
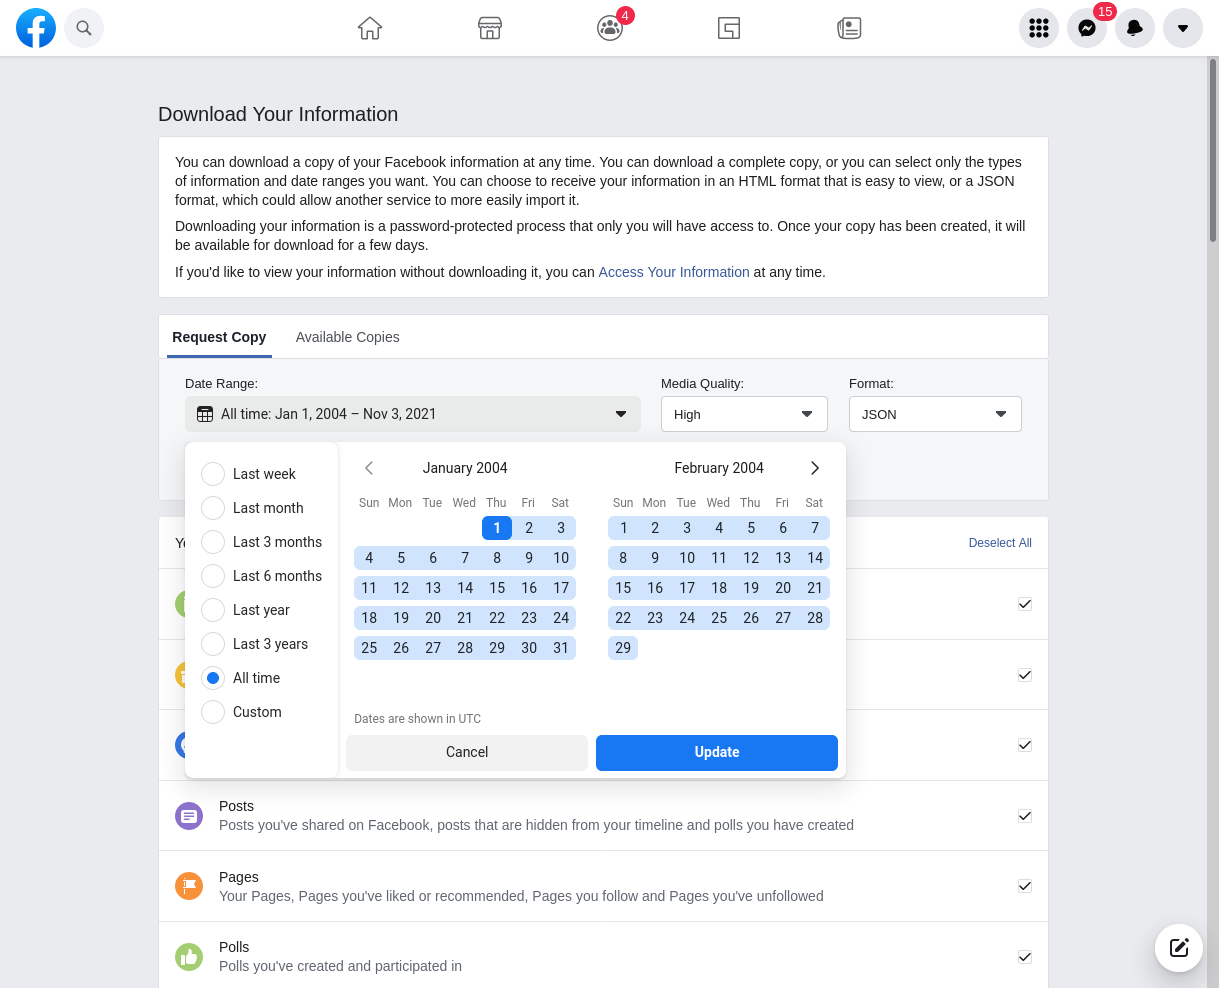
Like with with the other parameters if what you are looking for is to get all of your data out of Facebook you should select the “All Time” option. Then click “Update”. You should see the date ranges update with a selection that comprises the entire time you have been on Facebook. If you are looking for only a subset of data you can of course choose other options. Once you have configured these things the “Create File” button underneath should then be enabled. Click on it and it will begin generating your archive file. You should receive an email from Facebook confirming that you have started the archive process. The download page also contains information about the status of your download. A screenshot of what it looks like as that process unfolds is below:
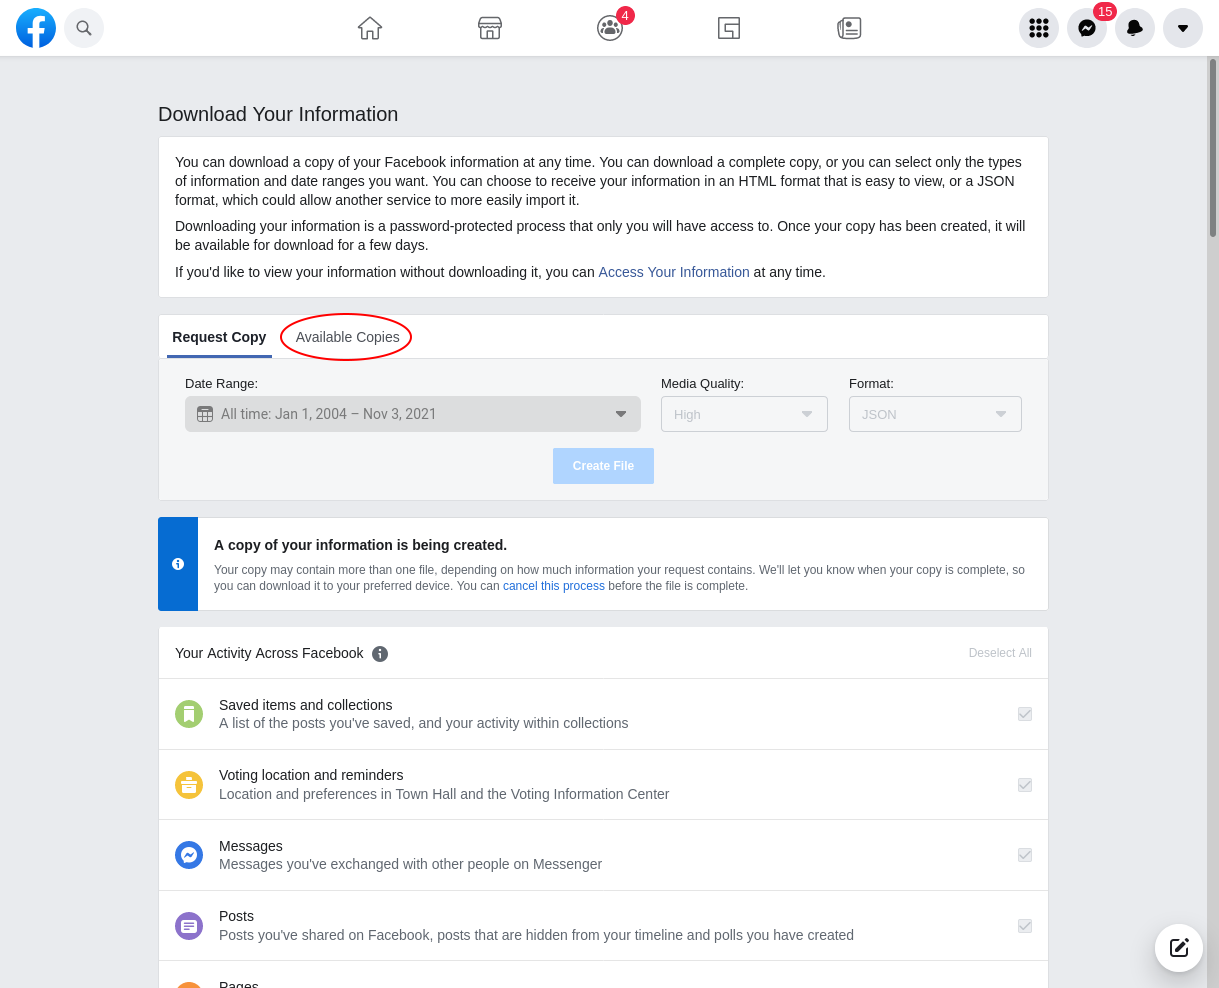
This blue information banner in the middle stating that “A copy of your information is being created” will persist until your archive is generated. Depending on how long you’ve been on Facebook and how much data you’ve uploaded this process can take from several hours to several days. This can be many many GB of data. If it is over a certain size, approximately 4 GB, Facebook starts breaking them up into mulitple ZIP files. Let’s look at my account as an example. It took three days to generate the archive of all my data which goes back to 2009. It generated two ZIP files of 3.5 GB and 2.7 GB for a total of 6.2 GB. zipped with almost 9000 posts, 4000 photos, 13 movies, and almost 2000 Facebook Messenger Conversations. More detailed information as well as a history of available copies that you’ve previously generated can be found by clicking the “Available Copies” tab. A screenshot of that is below before your archives are generated:
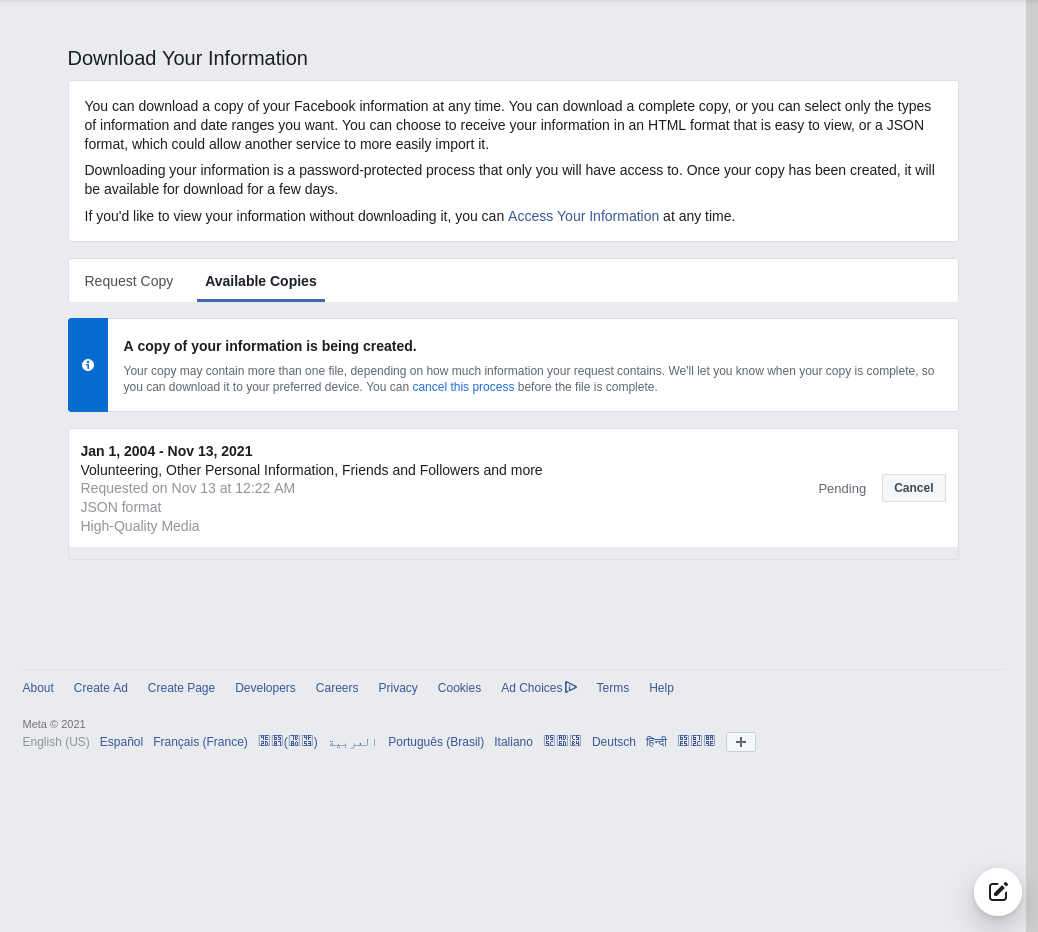
As we can see it provides us with the same information banner about it creating an archive. It also shows some summary data about the time frame the archive covers, the format type, media quality, etc. Once your archive is ready you should receive an email stating that it is ready to be downloaded and will be available for a few days. Below is a screenshot of what my “Available Copies” screen looks like with both small and large archives that I’ve downloaded for testing:
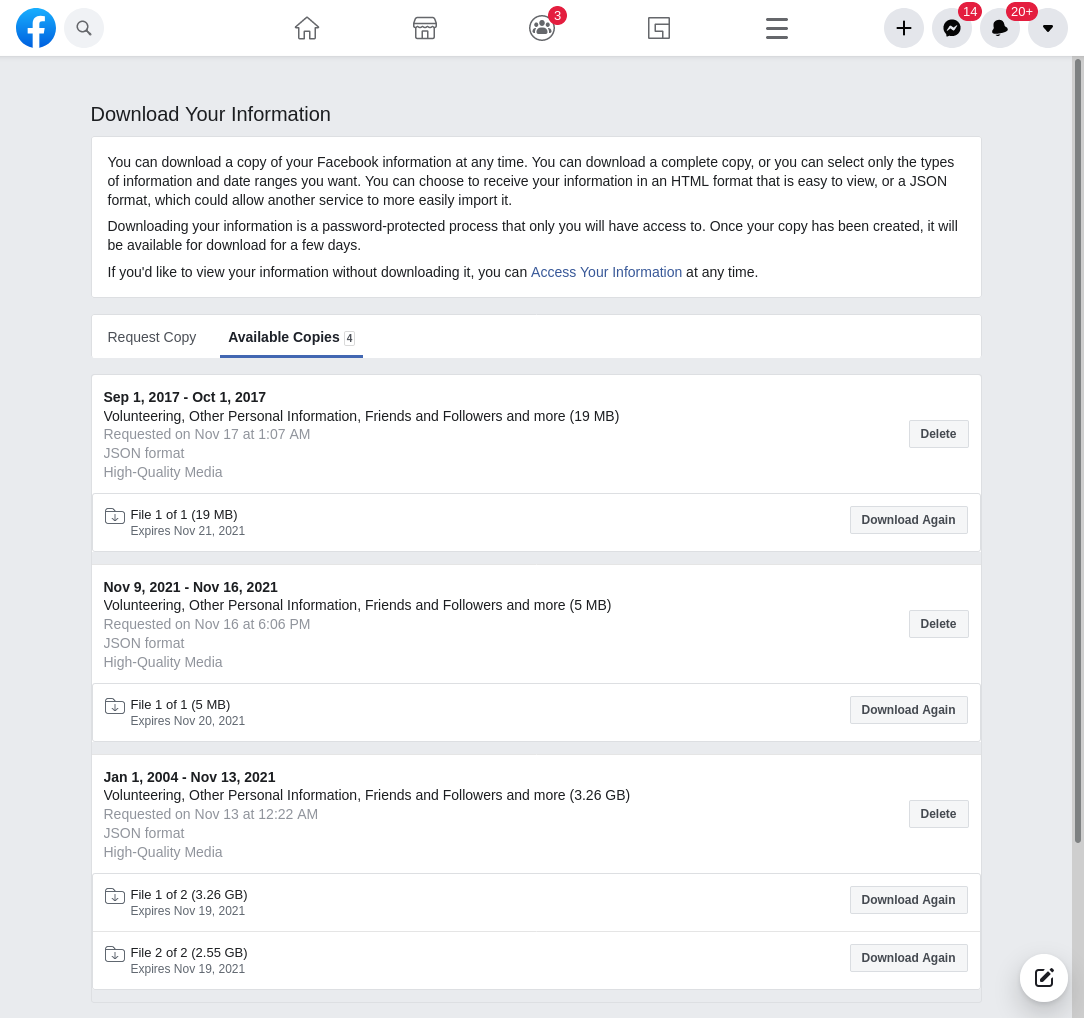
Because this has a lot of your private data Facebook only keeps the archive around for about a week or so. If you miss the window to download it you’ll have to generate it again. Once it is ready the “Available Copies” screen looks like below.
From here click on the “Download” button for your archive to begin the download process. Again this archive could be very very large depending on how many photos and videos you’ve posted to posts, comments, conversations, pages you manage, etc. When selecting a download location you should make sure you have enough room to store it and the unzipped copy from the next step. You will need to do this for each file if your archive is broken up into multiple files.
Once your download has finished you now have ZIP file(s) with all of the Facebook data that you can possible extract. The Kryanite tool is looking for the unzipped directory version of this file. Simply unzip the archive like you would any other zip file on your operating system. On macOS this is as simple as double-clicking on the archive to unzip it in place. On Windows you can right-click on the ZIP archive icon and choose the “Extract All..” option. On Linux you can similarly choose the right-click option and choose “Extract Here” or “Extract To…”. If you have multiple ZIP files you’ll need to unzip it into a common sub-directory with only those archives in it. Then you can point Kryanite at that top level directory. An example of what my two archive folder structure looks like is in the screenshot below:
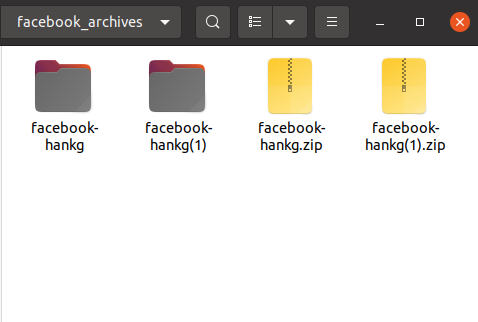
When I run Kyranite I point it to the “facebook_archive” top folder and it does the rest. If you only have one ZIP file and thus one uncompressed folder you can just point it to that directly.
See this post for more details on Kyanite .