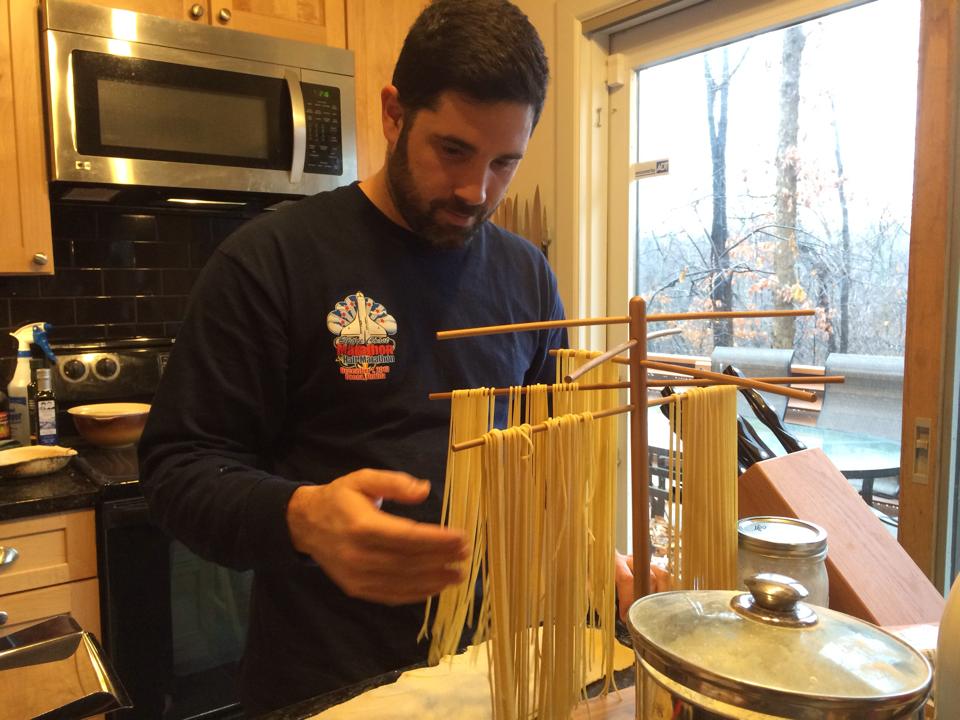
What better way to start off a series of diets that discourage the consumption of gluten and grains than by making pasta! It actually wasn’t my intention to do it on this sort of schedule. I had been planning on trying to make pasta for several years now, but in the past year I’ve just been getting more and more stoked about the idea. This led to a nice manual pasta maker and some other utensils showing up on my Amazon wish list. Thankfully I actually got these things for Christmas. The timing could be better of course, but I was determined to actually try my hand at making pasta before these items would be verboten for half a year. The results, in the end anyway, turned out amazing!
While I have a book dedicated to making pasta and at least half a dozen more with pasta recipes in them, I of course turned to the internet to get my first pasta recipe. Coming from my bread experience I was expecting there to be a relatively small number of ingredients, but I had no idea how bare bones these recipes can be. Some of the “fancier” recipes call for different types of flour, regular all purpose and semolina usually, but many of the ones I found call for nothing but eggs and all purpose flour. They all had some good rules of thumb, but I ended up choosing Mario Batali’s Fresh Pasta Recipe for my first try.
Mario’s recipe is basically four eggs and three and a half cups of all purpose flour. What you are supposed to do is pile all the flour on a wooden cutting board. Then you make a little crater in the middle that you put the four raw eggs in. You then scramble the eggs in this little crater and then slowly start incorporating the flour until you have this tacky ball of dough that you knead until it is smooth. The last part sounds a lot like what happens with bread, as the gluten strands form the dough gets that smooth texture that is important. Before that it’s just a mix of ingredients. The first steps however were a bit foreign to me, so I wasn’t sure exactly how to do it.
I piled the flour a bit like a volcano, and then formed what I thought was a good sized crater for four eggs. I crack the eggs one at a time in a small metal bowl (who wants egg shell in their pasta?) and then poured it into the pocket. Two eggs in it was clear that the pocket was a bit small. Three eggs in it was clear it was not big enough for four so I tried to make it a little bigger, to no avail. I poured the fourth egg in and tried to start incorporating and scrambling. It started okay but as I agitated the flour one of the sides of the volcano ruptured a little. I started scraping the eggs back into it, which wasn’t too hard since eggs are obviously pretty gloopy. Unfortunately the more I did this the worse it got, until I had egg running out of my perfect little pile and I was frantically trying to scoop it back in and “incorporate” it into the flour. I ended up grabbing a handful of flour from the dry side and throwing it on top. By that point part of the egg had run off the board, but I think I got most of it on. A little dough scraper action and I got everything back in the center.
Now the directions say that it will start off tacky and slowly start getting smoother. In my case it started off as a big mess of dry flour with a little egg in it and it continued to be a big mess of flour with egg in it. This is where doing my homework came in handy. If I was in a bread situation I would have gotten a little bowl of water and added a tablespoon or so at a time to start getting the liquid component up a bit. That probably would have been a disaster. I don’t recall which website I read it on, but their suggestion for a “slightly dry” dough was to wet your hands and then work the dough again. I therefore did it that way as I was trying to knead this dry as sand flour mess on my cutting board. The first time it did nothing, but four or five times running my hand under the faucet and continuing to knead and this thing was starting to take shape and look like the final product. The only problem was I hadn’t really kneaded it so much as stopped it from being a dispersed ball of clumpy flour.
I therefore kept kneading the dough for the required three minutes, even though it supposedly was the right texture. The kneading is supposed to incorporate ingredients and build some structure, so I may have already been there. However with the disaster of a beginning I wasn’t going to take any chances. Was I potentially making overly tough pasta? From what I could tell it isn’t like a pie crust where that could be a problem, so I just went with my instinct and kept kneading. Pasta dough is more like a clump of clay than a ball of nice soft dough like you’d have for bread. Kneading it is therefore a much different experience. If you’ve never kneaded bread dough, don’t worry the process isn’t hard. It’s just very different, and a lot more strain on the forearms.
Once I was done the kneading I set the dough aside to let it rest for twenty minutes. All the things I read said the rest phase is important, and from my bread making that’s not a surprise. You’ve basically spent a good ten minutes turning various liquids and dry ingredients into one cohesive mass and then beating all this gluten structure into it. It’s now time to give it a little rest and let all that work kind of settle in for a bit. Fortunately in the case of pasta you only have to do this once, and it turns out 20 minutes is pretty much as long as it was going to take me to get the machine ready.
While I have a Kitchen Aid Mixer that has some amazing pasta making attachments, they are a bit on the expensive side. I therefore put a manual pasta maker on my wish list, and that’s exactly what I got. My particular selection was the Imperia CucinaPro Pasta Maker. Even at $70 it’s only $30 more than the inexpensive ones. I figure it would be better to spend the extra $30 on a machine with really good ratings rather than one that would tick me off. Once the dough was successfully rested and I figured out how to clamp the machine to my counter, I started trying to get the dough into a strip thin enough to fit into the machine and not too wide.
That actually proved to be a bit of a problem actually. My dough was still a bit drier than it should have been, I’m guessing, because when I added the “dusting of flour” the machine instructions stated I instead got something that looked all creased and cracked. What was worse was that the dough wouldn’t go into the machine. I even made sure that the rollers were on the widest setting. Finally after some additional thinning and forcing it snagged and from that point on as I cranked the machine it fed the dough through. The results of the first pass were disastrous looking. It was clumpy, with holes and big gaps. It looked more like fruit leather than big sheets of pasta. Perhaps that is always the case, but I again am chalking that up to my overdry dough. The instructions say to run it through multiple times on this thickest setting. Each time you do it, you are supposed to dust it with more flour, fold it in half and run it through.

Since my dough was already too dry, in my amateur estimation, I just folded it in half and ran it through again. This pass looked a lot better, so I had a let those thoughts of having to start over leave my head. The next pass through it looked like fresh wide noodles. I breathed a sigh of relief and continued processing it. Now it was time to start thinning it out, so per the instructions I notched the press thickness down one setting and ran it through twice. At this point the sheet was getting long so I cut it in half. I then repeated the process for each of these pieces for each of the settings. Basically run each piece through twice on each setting to get it to thinness you wanted. I didn’t go as thin as the machine would go, but I went to what would be your typical vermicelli spaghetti thickness. One last pass and I had what I needed. At that point I ran it through the cutter unit on the other side and magically I had over a pound of fresh pasta hanging in my kitchen drying for dinner.

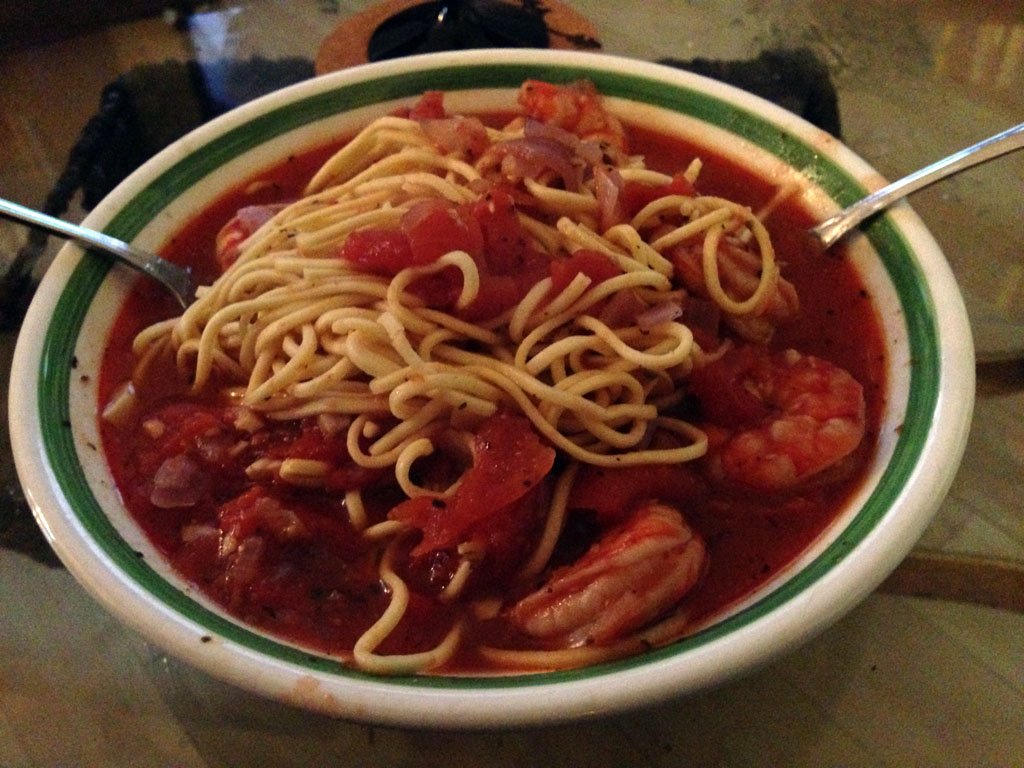
To try out my new pasta I decided to whip up a quick shrimp marinara sauce. Half an onion, a few cloves of garlic, a can of plum tomatoes, seasoning and time and voila I had a sauce ready for my pasta. Cooking fresh pasta is a lot faster than your typical dried pasta. For vermicelli we are talking about 2-3 minutes tops, so as soon as the sauce was ready I threw on another pot and boiled the pot. Pardon the crappy picture, but as usual it didn’t occur to me to actually take a picture until I was sitting down to eat it.

The upshot, is that it is delicious, even with all the hiccups at the beginning! It also wasn’t especially complicated or time consuming. I have at least one more meal worth of fresh pasta left in the fridge ready to go. Because I know exactly what is in it, that it tastes better than dried and it wasn’t that hard to make, I think I’ve found my new “from scratch” food that will be a staple process for me. This will be especially true if I have to learn how to make it without flour in the case that the Paleo diet turns out to be the one that my body performs best on.


 2013-12-30
in

 9 min read