


 2023-04-03
in
2023-04-03
in

 10 min read
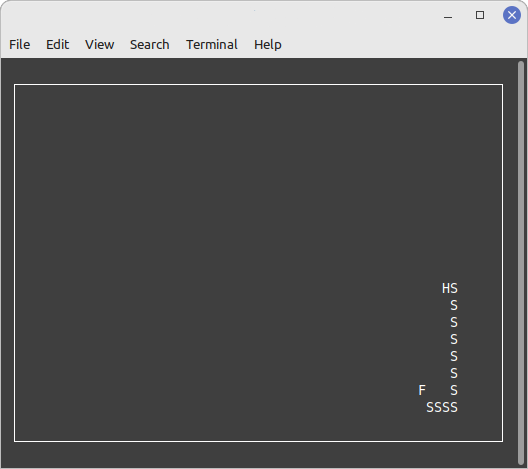
The first Dart Snake target in this project I will discuss is targeting the command line interface (CLI). Here I will show how we create a Dart command line application that will use the snake library from the first step with the ncurses library to make an interactive CLI app. The code for this project, as well as screenshots, and other details can be found at the dart-snake GitLab project page . This is open sourced under an Apache 2.0 License.
Dart makes it very easy to create console applications. If you are unfamiliar with the mechanics of that I recommend the Dart Tutorials on the main dart.dev website . For this series I’m going to just concentrate on implementation details of the application. You can find the source code for this in the snake_console directory of the GitLab repository . This has a top level source code structure of:
├── bin
│   └── snake_console.dart
├── lib
│   ├── key_types.dart
│   └── ncurses_tilestate_extensions.dart
Presentation Layer Design
As I wrote in the first post, we have all of the game logic in the snake_lib library. For this “all” we need to do is implement the presentation layer. What does that practically look like? First, we need a way to write characters arbitrarily on the screen and remove them. That means that a standard “write to standard out” won’t work since that creates just a scrolling display. That is where the ncurses
library comes in so we don’t have to worry about doing any of the low level work on that. What we will have to do is map our game business layer’s TileState to something we can draw on screen and respond to changes in the GameBoard state to update our screen. Second, we need to capture keyboard events continuously in order to allow the user to navigate the snake around the board. Listening to and reacting to keyboard events is something that is built into the Dart standard library.
The core main method of the game is very straight forward:
Future<void> main(List<String> arguments) async {
  final screen = Screen();
  final height = lines - 3;
  final width = columns - 3;
  final game = setupGame(screen, width, height);

  stdinStreamSubscription = stdin.listen((keyValues) {
    final key = KeyTypes.fromValue(keyValues);
    final running = handleKeyStroke(game, key);
    if (!running) {
      game.stop();
    }
  });

  game.start();
}
Here we are getting an ncurses screen to be initialized, which generates the current line and column count implicitly. Next we setup our game (which we go into in a moment) object and game board. After that is setup we start listening for key events, including one which will tell us to stop the game. Then we start our game. We will get to the end of this method almost instantly but because we are listening to key events the application will continue to exist until we tell it to stop. Let’s therefore start with the keyboard event handling.
Intercepting Keyboard Events
In the console application keyboard events are all coming through “standard in” (stdin), which is part of the dart:io standard library. This property actually returns a Dart Stream
of integer lists which will represent each of the key events that a user types. Each integer list represents the byte fields of the keys in question. A feature of Dart Streams is that we can attach a listener method to them to interact with those values:
stdin.listen((event) => print(event));
For example would echo any of the key events to standard out. We will use this to look for arrow key inputs from the user or the backspace key to exit the game.
|
|
As I wrote above keyValues is the actual bytes, represented as a List<int> for each key that is pressed. For readability purposes I decided to do key mappings through an enumeration called KeyTypes:
|
|
Dart enums have some cool features that I’m leveraging here. First, they can have specific values of any type. In this case I’m having the values be a specific integer sequence for each key. You achieve the values override by implementing a constructor of that type and storing that (lines 12-13). Dart enums can also have methods on them. In this case I’m creating a static fromValue method (lines 15-20) that can be used to easily create a variable of this type from the corresponding byte values. Within that method I’m using the enum’s values field that lists all of its values combined with the firstWhere iterator method to return the matching value or unknown.
With the key type in hand we can then go down to our handler method:
bool handleKeyStroke(Game game, KeyTypes key) {
  var running = true;
  switch (key) {
    case KeyTypes.up:
      game.snake.changeHeading(Direction.up);
      break;
    case KeyTypes.down:
      game.snake.changeHeading(Direction.down);
      break;
    case KeyTypes.left:
      game.snake.changeHeading(Direction.left);
      break;
    case KeyTypes.right:
      game.snake.changeHeading(Direction.right);
      break;
    case KeyTypes.backspace:
      running = false;
      break;
    case KeyTypes.unknown:
      outputs.writeln('Unknown key values: $key');
      break;
  }

  return running;
}
Here we can see that the keyboard handling logic is very straight forward. In our game business layer the Snake class has the concept of changing heading. We just have to map the key pressed to the Direction type for the heading changed. That’s it. We also listen for the backspace key and return false if we aren’t supposed to be running any longer.
Setting up the Game and Gameboard
Setting up the game and game board is a straight forward affair.
|
|
First, line (2) we are setting up the ncurses window we are going to be drawing into. Next we setup the game board itself, which we will get to in a moment. Then we simply initialize the game itself. The Game constructor is broken down into these fields:
- Width and height (lines 7 and 8) to define the size of the game surface
beforeStepto let us do anything before the game updateafterStepto let us do anything after the game updateonGameOverto let us do anything after the game is overonStopRunningto let us do anything on shutting down the application
The before step here doesn’t need to do anything besides the standard game board update. We therefore just call that one method from the business layer level. The after step does this as well however ncurses will require a window refresh to reflect the new state of its display buffers. When the game is over we want to display a “game over” prompt with the player’s final score and instructions on how to quit. Lastly when the player decides to end the game we want to stop listening to the key event stream (line 35) and end the ncurses section. It is the cancelling of the key event stream that will allow the application to exit. The try/catch blocks around the game steps is to prevent the app from crashing and to send errors to a log file since our display is totally occupied with the game surface.
The Game Board initialization is where we are going to do the final tie in to the game business layer:
|
|
First we create our game board and initialize it. Dart has a cool double-dot syntax called “Cascade Notation”
that allows one to call a method and have it return the object it is attached to as the result. It comes in handy for chaining methods together as well as the above use case. The big work in this method is setting up so we are listening for a change in any of the game tile states. As we discussed in the first article we are leveraging the Riverpod
library’s StateNotifier in our GameBoardTile class to allow anyone to listen to and respond to a change in state event. The GameBoard’s before/after handlers will update any tile whose state changed due to the snake moving, the food changing location etc. By attaching ourself to each tile’s listener we can change just the tiles that have a new display state. For implementations that have larger frameworks, like Flutter or Jaspr, this step is taken care of for us. Here though we are responsible for managing these sorts of handlers.
Whenever we need to draw a tile update we are going to use the ncurses window.addString method. It takes a string and, optionally, where we want to draw it. The Tiles have all of the information we need for that. Notice however that the tile’s state in the business layer looked like a simple enumeration:
enum TileState {
  border,
  background,
  food,
  head,
  body,
  ;
}
Yet here we are saying we want to get the state.text property. We are accomplishing this by adding an extension method on our enumeration at the app level.
import 'package:snake_lib/snake_lib.dart';

extension TileStateExtensions on TileState {
  String get text {
    switch (this) {
      case TileState.border:
        return '';
      case TileState.background:
        return ' ';
      case TileState.food:
        return 'F';
      case TileState.head:
        return 'H';
      case TileState.body:
        return 'S';
    }
  }
}
This returns the single character value we have chosen to represent the various tile states.
Conclusion
With all of the above now we just go into our directory in a terminal window and type dart run to play our game. The only caveats I’ll add for this implementation is that the ncurses wrapper library is very finicky about the ncurses library location. I ended up having to do a quick patch to get it to properly recognize it on my Linux Mint development box. I have yet to get the secret sauce right for how to get it to find the library on macOS and Windows. One thing I hope to do is contribute back to that library some code to make that aspect of the Dart wrapper to ncurses more robust.
With these handful of lines of code, leveraging the Dart standard library for picking up key events and ncurses for drawing them, we’ve easily created our CLI Dart Snake program with maximal code reuse of the business layer logic.